The N-Tier Framework for Windows Forms is designed to put the developer in control with tools and APIs for the rapid development
of database applications in c#.
Updated to work with Visual Studio 2012.
NTier is designed to leverage developers' skills and familiarity with Visual Studio and Windows Forms to
quickly build large business applications. NTier provides tools, frameworks, designers, extender providers and helper
classes to make database application development easy without replacing familiar tools completely or simply
providing an inflexible code generator.
A key design principal is that each feature of NTier is decoupled from other NTier features and works with and not
against the Visual Studio tools, APIs or form designers. The developer is free to use as few or as many features
that are found to be useful without the need to radically change the design of the application.
This project was written using .net 2.0 (with the exception of linq entity extensions).
What an NTier application looks like
Click the screenshot below (requires Internet Explorer 8 or above) to run an NTier application inside of the browser.
For Internet Explorer 9 and above, XBAP will need to be enabled (the application runs in a partial trust sandbox):
"Internet Options -> Security -> Internet -> Custom Level -> XAML browser applications -> Enable"
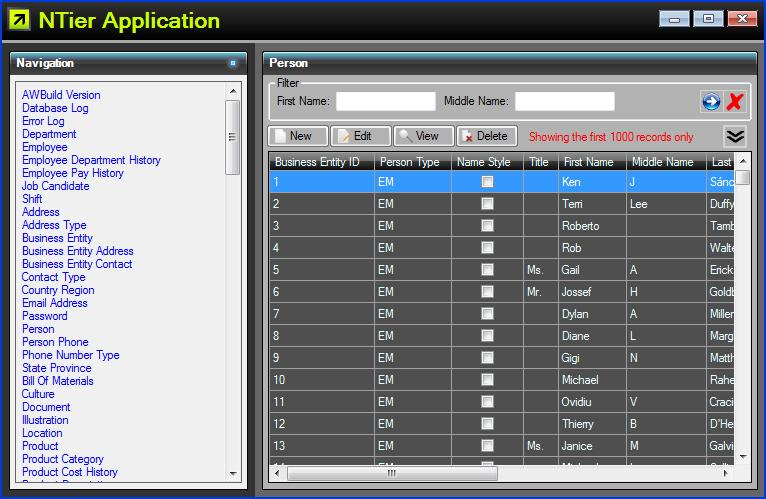
This application was generated automatically from the Adventure Works database schema that comes with
Microsoft Sql Server using the NTier Application Wizard.
Note that forms generated for the application will need to be adjusted so that relationships are presented to
the user in a sensible way.
The "Microsoft .NET Security Warning" and extra frame indicate the application is running in a partial trust sandbox:

These artifacts are not present when running in ClickOnce full trust mode or as a desktop application.
A brief list of capabilities
Below is a list of NTier capabilities available at each tier of a typical line of business application.
Data Binding
- Easy to configure win forms UI <-> model data binding using extender provider
- Validation methods provide Error/Warn/Info property icons with extender provider
- Entity validation methods provide Error/Warning/Info property icons using extender provider
- Meta-data binding for max len, read only, dec pl, drop lists from the entity
- Localizable control labels data bound from a property attribute or .resx file
- DataGridView support for the above features
- TreeView control data binding support
UI
- Database application wizard to help get started quickly
- Control extender framework, eliminating the need to inherit from WinForms / 3rd party controls
- Actions provide design time configurable commands for buttons and menu items
- Lookup control
- Property / validation method navigation from control in designer
- Automatic control naming based on data bound property name
- Other Visual Studio design time enhancements for controls
- Numerous .net framework APIs and helper methods
Entity
- A complete ORM framework that's easy to use
- ORM entity class editor in Visual Studio
- ORM POCO support
- ORM web services / WCF middleware support
- ORM custom type support for simple types
- ORM entity overrides for saving and saved events on client and in middleware
- ORM entity condition filter attributes for entity or collection
- ORM IL, CodeDom and compile time support for entity proxy
- 70 entity code verification checks integrated into the Visual Studio build
- Automatic in-memory synchronization of entity sets on load and save
- Meta-data attributes provide calculated max len, read only, dec pl, drop lists and validation
- Extensible validation API that integrates with the UI
- Basic linq to sql functionality
- Numerous .net framework APIs and helper methods
- Tools and APIs are compatible with Microsoft Entity Framework, if that is preferred
Data
- Microsoft Access and Sql Server support
- Data - ORM auto-incremented identity column support
- ORM runtime sql code generation supporting lazy and eager retrieve
- Data provider API can be used to support other database providers
- Visual Studio database schema editor
- Automatic database upgrader APIs that can be embedded into the application
- Numerous .net framework APIs and helper methods
Other
- Basic email error reporting functionality
How to get started
See the complete Getting Started Guide for full instructions, or continue reading below for a brief summary.
The first step is to download and run the
NTier for Visual Studio installation package.
After installation, and restarting Visual Studio, there are two ways to create an application with NTier:
1. Create an application from a database schema as a starting point
The NTier Application Wizard can be used to create an application from a database schema complete with
a main form, navigation bar, grid, data entry forms and lookup selection forms.
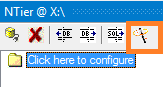
- Open Visual Studio and click Tools->NTier to load the NTier Designer. The NTier tool window will appear.
-
Click the NTier Application Wizard icon on the tool window:
- The application wizard pane will appear. Follow the instructions, clicking Next to navigate forwards.
- By default the application will be generated to C:\NTierApplication, which can be changed on the Settings tab.
- Click Finish to commence code generation.
- Open the created project in Visual Studio and press F5 to start the application.
| Note: |
The NTier Application Wizard is not intended to create a complete application but rather a runnable
application project that can be used as a starting point.
|
or
2. Create a new NTier Application project
- Click File->New->Project. The 'New Project' dialog will appear.
- In the left 'Project types' pane, choose 'NTier'.
- In the right 'Templates' pane, choose 'NTier Windows Application'.
- Choose a name and location and press the OK button.
- Edit App.config and change [ProviderName] to Microsoft.SqlServer and [ConnectionString] to an appropriate database connection string.
See the complete
Getting Started Guide for full instructions and information on how to add tables, entities and forms.